Booking your first glamping trip sounds easy until you actually sit down to do it. Is a glamping site closer to a hotel or a campground? Will there be a real bathroom? Do you need to bring sleeping bags, or are the beds made up for you? Many first-timers arrive unsure what they’ve signed up for, and that uncertainty can turn a fun getaway into a stressful one if you show up unprepared.
This guide walks you through what to expect before you book. We’ll cover what the different stay types actually look like, which amenities are usually included and which aren’t, what a typical night costs and when to reserve, how to pick the right site for your first trip, what to pack, and how check-in day usually works. By the end, you’ll know exactly what you’re getting into and what to bring, so your first night under canvas feels like a treat rather than a surprise.
What a Glamping Site Actually Looks Like
The first thing to know is that “glamping” covers a wide range of structures, not just one type of tent. The most common options you’ll see when browsing are safari tents, yurts, cabins, Airstream trailers, and dome tents. Most of these units are built for couples or small groups, with standard setups sleeping 2-4 guests, while some family-sized units can accommodate 5-6. If you’re traveling with kids or friends, check the stated capacity before booking rather than assuming.
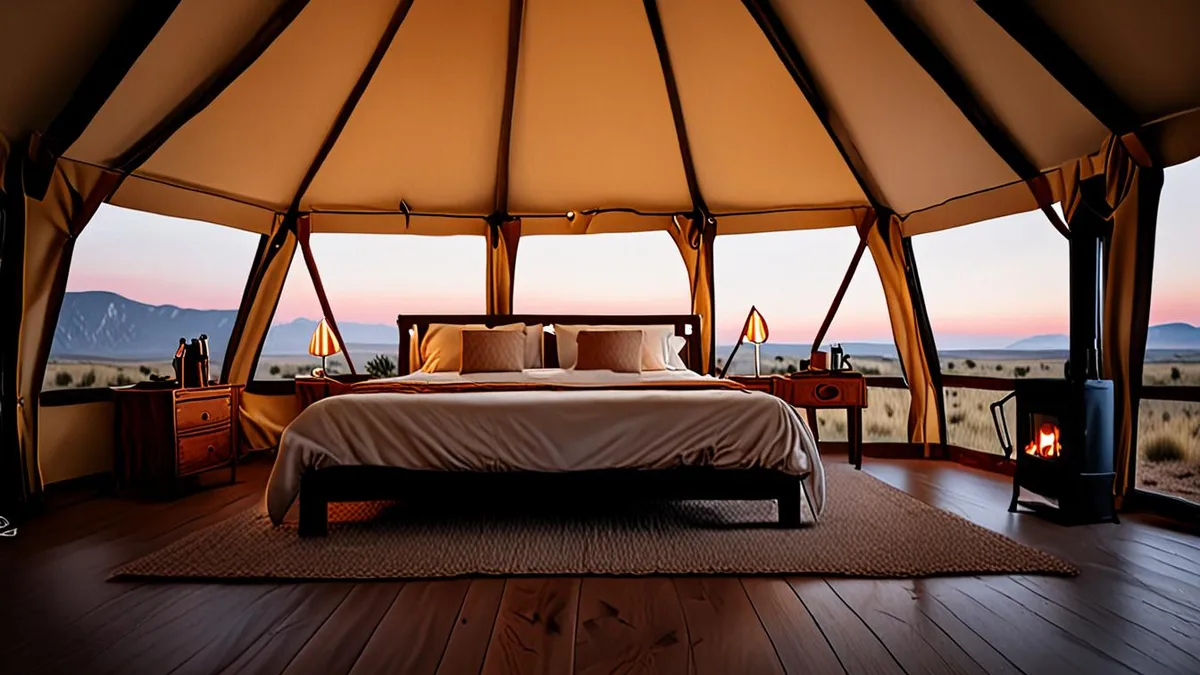
Whatever the structure, the defining feature of glamping is that you don’t camp in the traditional sense. A typical setup includes a real bed with proper linens, lighting you don’t have to crank or fuel yourself, and often heating or a wood stove to take the edge off cool evenings. That last part matters more than many first-timers expect, since tent-style units can get chilly after sunset even in warm months.
How sites are laid out
Many glamping sites don’t consist of isolated units scattered in the woods. Instead, they cluster several tents or cabins around shared areas like a central fire pit, a communal deck, or a shared camp kitchen. This layout can be a plus if you enjoy meeting other travelers, and a drawback if you were picturing total seclusion. Look at the site map or photos before booking to see how close your unit sits to its neighbors, and whether the atmosphere leans social or quiet.
Amenities: What’s Included and What’s Not
Amenities vary widely between sites, but there’s a common baseline you can usually count on. Most glamping accommodations offer either a private bathroom or access to shared bathroom facilities, and many include a kitchenette or a shared camp kitchen for basic meal prep. Wi-Fi is common but not universal, so if you need to work or stream during your stay, confirm it’s available in your specific unit rather than just somewhere on the property.
Beyond the basics, many sites add extras that push the experience closer to a boutique hotel. Fire pits are nearly standard, and it’s not unusual to find BBQ grills, hot tubs, and dedicated outdoor seating areas like decks or patios with chairs. These features are often what justify the price over plain camping, so prioritize the ones you’ll actually use.
Just as important is knowing what’s typically left out. Before you book, check the listing for these common gaps:
- Daily housekeeping: most sites clean between guests only, so bring extra towels if you’re staying several nights.
- Full kitchens: a kitchenette usually means a small fridge, kettle, or two-burner stove, not an oven or full cookware set, so plan simple meals.
- Reliable cell service: remote locations often have patchy or nonexistent coverage, so download maps and entertainment before you arrive.
Reading the fine print on these three points will save you from most first-timer disappointments.
How Much Glamping Costs and When to Book
Glamping costs more than a campsite but usually less than a hotel room in the same area. In the US, expect to pay roughly $100 to $300 per night for a standard unit, with high-end luxury tents reaching $400 or more. Price tends to track with the level of amenities: a dome tent with a shared bathhouse sits at the low end, while a safari tent with a private bathroom, hot tub, and full kitchen setup sits at the top.
Timing your booking
Season makes a big difference to both price and availability. Peak season runs roughly June through August, when rates are at their highest and sites fill up fastest. The shoulder months of May and September-October offer noticeably lower prices and fewer crowds, and the weather is often still pleasant enough for outdoor living. If your schedule is flexible, a shoulder-season trip is the easiest way to get more value from the same unit.
Booking windows matter too. For summer weekends, reserve 2-6 months ahead, since the best units go first. Shoulder-season midweek trips are far more forgiving and can often be booked just 2-4 weeks out. One more thing to check before you commit: many sites enforce a 2-night minimum stay on weekends, which can affect both your budget and your travel plans. Confirm the minimum when you book so there are no surprises at checkout.
Choosing the Right Glamping Site for Your First Trip
Your first glamping trip will be shaped more by the site you pick than by anything else, so it pays to be a little picky. The single biggest comfort question is bathrooms. Some units come with a private bathroom attached or just steps away, while others rely on a shared bathhouse that you walk to in the dark. If you have never camped before, a private bathroom makes the transition much easier and is worth prioritizing, even if it costs a bit more.
Next, look at location. Most glamping sites sit within a 5-30 minute drive of the nearest small town, but that range matters a lot in practice. A site five minutes from a grocery store and a coffee shop forgives packing mistakes. A site thirty minutes down a winding road does not, especially if you arrive late or forget something important like coffee or firewood.
Before booking, spend real time on recent reviews rather than the listing photos. Owners naturally post their best shots, and a tent that looks spacious in a wide-angle photo can feel cramped in person. Reviews from guests who stayed in the same season as your trip are the most useful, since they reflect the conditions you will actually face.
- Heating mentions: Search reviews for words like “cold,” “heater,” or “wood stove” to learn whether the unit stays warm at night, since tent-style structures can lose heat fast once the sun goes down.
- Noise between units: Reviews often reveal whether walls and canvas are thin enough to hear neighboring guests, which matters if you are a light sleeper or the site clusters units close together.
- Photo accuracy: Look for guests who post their own photos, because side-by-side comparisons with the listing will show you the real size of the bed, deck, and bathroom.
- Setting versus access: Decide what your trip is for. A remote site deep in the woods delivers quiet and dark skies, while a site near trails, towns, and attractions makes day trips and restaurant dinners easy. You usually cannot have both.
- Unit placement: If the site has several units, some reviews will mention whether yours is near the parking area, the fire pit, or the hosts’ house, which changes the feel of the stay considerably.
What to Pack for a Glamping Trip
Glamping gives you a real bed, but it is still the outdoors, and packing for it looks a bit different than packing for a hotel. The number one mistake first-timers make is underestimating how cold it gets at night. Tent-style units, yurts, and domes cool down quickly after sunset, even in the middle of summer, so bring layers and a warm jacket you can throw on for evening fires and early mornings.
Lighting and power are the next thing to think through. Many sites have limited electricity, and even those with power often have dim lighting inside the unit. Paths between units and shared areas can be dark, so a flashlight or headlamp is not optional. A portable phone charger also earns its place in your bag, since outlets may be scarce or shared.
Footwear and food round out the essentials. Expect gravel paths, grass, and possibly mud after rain, so leave the sandals in the car. And before you book, check whether the site has a kitchen, kitchenette, or a restaurant close by. If not, you are responsible for every meal, so plan your groceries and a cooler accordingly.
- Warm socks and a beanie: Even with a heater or wood stove, extremities get cold overnight, and these two items take up almost no space in your bag.
- Headlamp over handheld flashlight: A headlamp keeps both hands free for unlocking gates, carrying firewood, or finding the bathroom on a dark path.
- Closed-toe shoes with grip: Trails and gravel driveways punish flip-flops, so pack one sturdy pair for walking and something comfortable for around the unit.
- Bug spray for warmer months: Mosquitoes and other insects gather around standing water and evening fire pits, so a good repellent makes outdoor seating actually usable.
- Cooler and meal plan: If there is no kitchen or restaurant on site, bring a cooler with ice, easy-to-cook foods, and enough drinking water for your whole stay.
- Small comforts: A book, cards, or a portable speaker make evenings around the fire better, since many glamping sites have no TV and patchy cell service by design.
Arrival Day: Check-In and Settling In
Arrival day sets the tone for your whole trip, and a little planning goes a long way. Glamping sites run on tighter schedules than hotels, with less staff on hand and sometimes no one at the front desk at all, so showing up outside the expected windows can leave you standing at a locked gate or waiting on a host. A bit of preparation for that first afternoon makes everything that follows easier.
- Plan your drive around check-in times. Check-in is typically 3-4 PM and check-out is 10-11 AM, so build your travel day backward from that afternoon window rather than hoping for an early arrival.
- Get there before dark. Many sites have unlit paths between units, and finding your tent, the bathroom, and the parking spot for the first time is far easier in daylight.
- Do the walkthrough or read the welcome guide carefully. Hosts usually cover how the heating works, how to operate the water system, and the rules for the fire pit, and missing these details is the most common source of first-night frustration.
- Test the essentials right away. Turn on the heat, check the lights, and locate the bathroom before the host leaves, so any problem gets fixed while someone is still around to help.
- Unpack and set up your evening plan. Get your food stored, your layers accessible, and your firewood or lighting sorted while it is still light, so your first night is relaxed instead of a scramble.
Once you are settled, take ten minutes to walk the site in daylight and note where everything is: the fire pit, the water source, and the nearest bathroom. If a question comes up later that the welcome guide does not answer, message the host early in the evening rather than at midnight, since response times can be slow on small properties. And if you are the type who plans every detail down to the last form and signature, the same careful-question habit that helps you prepare for something like what to ask a lender before refinancing your home loan works just as well here: ask your host the small questions before arrival, and the trip runs itself.
Your First Glamping Trip, Summed Up
Glamping sits comfortably between a hotel and a tent: you get a real bed, linens, lighting, and often heating, all set in an outdoor landscape rather than a lobby. For most US sites, that experience runs roughly $100-$300 per night, with high-end tents climbing to $400 or more.
The main worries for first-timers are easy to cover. Book summer weekends 2-6 months ahead, pack layers and a flashlight or headlamp, and pick a site type that matches your comfort level, whether that means private bathrooms or a shared camp kitchen. Keep the standard arrival and departure windows in mind when you plan your drive, since they shape how early you can settle in and how much of the day you’ll have on either end of your stay. With those basics handled, a first glamping trip usually turns out smooth and enjoyable. If you’ve gone glamping before, share your experience in the comments, or pass this guide along to a friend planning their first trip.